Some hoses lie in the grass throughout the summer like slender, slumbering snakes, others are coiled and hung neatly on walls or decks, and few are carefully put away in the potting shed after every use. But eventually the day comes when the trusty hose is uncoiled and, with a soft crackle, it starts to spray random jets of water high into the air. After a few moments spent considering the pros and cons of making the old thing into a soaker hose, most of us shrug and head for the garden centre to buy a new one.

This hose house-or barn-prolongs the life of your hose; it creates shelter from harmful rays and less strict coiling requirements. Plus it's portable. We used pine because we like the colour of the weathered wood, however cedar or redwood is a good choice-both are more rot resistant. It can be made from one 14' long, 12" wide and 1" thick board, with very little left over, or simply bits and pieces of wood you have lying around. Have fun, be creative-this is folk art!
Tools:
- Carpenters square
- Handsaw, bandsaw, chop saw, mitre saw, or jigsaw
- 2 or 3 36" bar clamps
- Tape measure
- Pencil
- Try square or combination square
- Chisel
- 12" bar clamps-may be necessary
- Marking gauge
- Block plane or smooth plane
- Bevel gauge
- Electric dril
- 5/64" drill bit for pilot holes
- 1/2" drill bit or other depending on dimensions of rope
- Screwdriver
- Tack hammer
Materials:
- 14' long by 12" wide by 1" thick pine board or other wood
- 8' 2 by 4
- 8' 2 by 2-you will need just over one of these
- 1 5/8" deck screws
- 4' of 1/2" rope or equivalent for handle
- 2" hasp
- 1 pair of 4" hinges
For windows and door:
- Scraps of 1/4" plywood
- 3 or 4' of 1/4" by 1/2" pine
- 3' of 1/4" by 3/8" pine
- 1/2" and/or 3/4" wire brad bit
- Craft paint (optional)
Step 4

Step 5a

Step 5b
Step 8
Step 9
Step 10
Step 11
Step 13
Step 14
Step 15a
Step 15b
Step 17
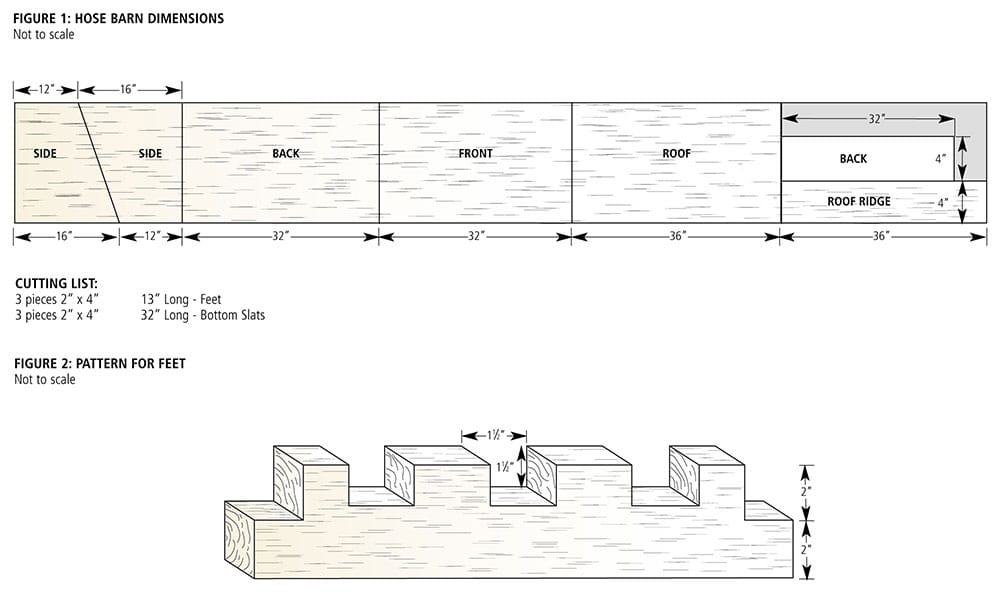
- 1 Measure and mark the dimensions (figure 1) for the side pieces. Cut them out using the saw you are most comfortable with-crosscut handsaw, circular saw, chop saw or mitre saw.
- 2 Measure and cut the back piece. Use it to mark the length of the front, and cut it out.
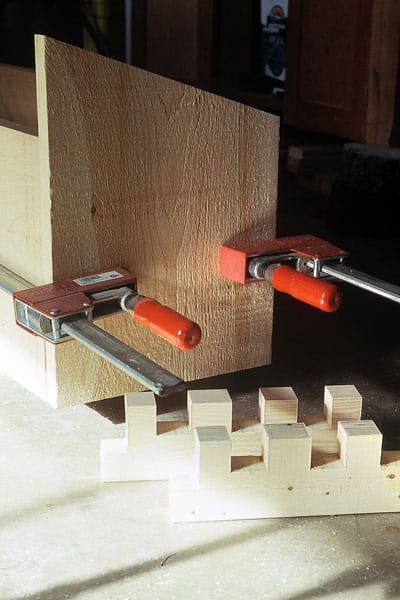
- 3 Assemble the front, back and sides so that the sides overlap the end grain of the back and front pieces. Clamp the box together with two long 36" bar clamps. Measure from corner to corner diagonally with a tape measure to check that the box is square.
- 4 To begin making the feet, cut the 2 by 4 into three 13" lengths. Place them on edge, underneath the box. Two should line up square to the inner face of the sides and the third should be placed at the midpoint of the box. All three should protrude 1/2" from the front and back of the box. Mark each foot at the inside faces of the front and back pieces; number them to keep them in order. Pencil an arrow on each, identifying which end faces the front of the box.
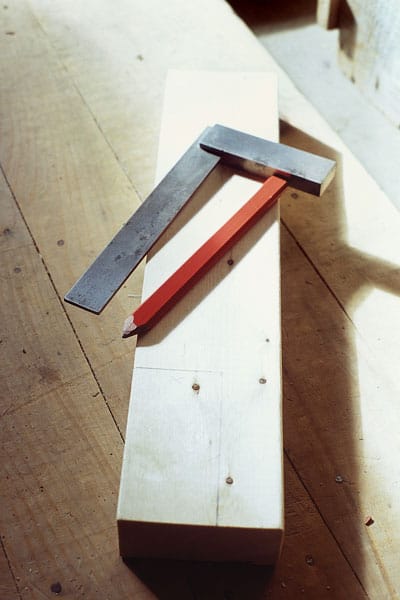
- 5 To make the notches in the ends of the feet, use a try or combination square to transfer the lines (from step 4) 2" down and then out to the end, parallel to the top edge. Mark the areas to be cut out with an X, and cut them out by hand or bandsaw.
- 6 Put the feet back in place, slotting the sides down into the notches. Trim them back if necessary to get a snug fit. Once they fit nicely to the inside of the box, decide if you want to leave the feet slightly protruding. Or if you prefer, cut them flush with the outside faces.
- 7 Measure the inside length of the box-at the bottom if you can-and cut three (or four) slats of this length for the bottom. Fit these into the box and space them evenly across the feet. Hold them in place and mark where they rest on the feet. Remove them and, with an X, indicate the sections to be cut.
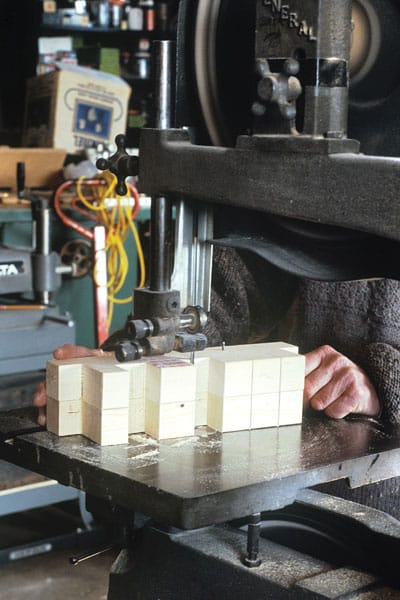
- 8 To notch the feet for the slats either cut them out individually, or temporarily nail two together and cut them out, then use one as a template for the third. Whatever method you choose, first square the lines from the top, 1 1/2" down the front face, and join them across the bottom. Then cut them out (figure 2,) either with a bandsaw, or with a handsaw followed by a chisel and mallet-to square up the bottoms of the notches so the slats will lie flat.
- 9 Reinsert the feet, slot the bottom slats into their notches and check for fit. There may be some adjustments necessary.
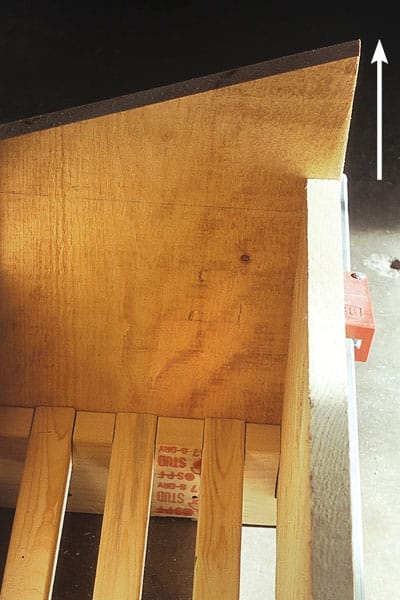
- 10 With the feet and bottom slats in place, carefully slack off the rear clamp and slide the back piece up until it is level with the peak of the sides. Move the clamp up and tighten it again. Measure the width of the gap between the foot notches and the bottom of the back piece you have just moved. With this dimension in mind, use the wood you have left over to plan the layout of the three remaining pieces-the back piece to cover the gap, the roof ridge piece, and the main roof piece. Cut the pieces out.
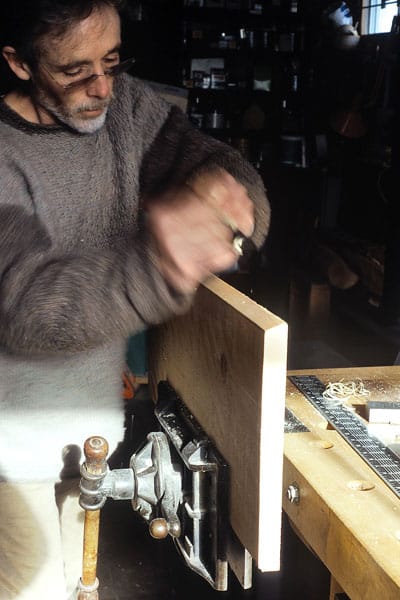
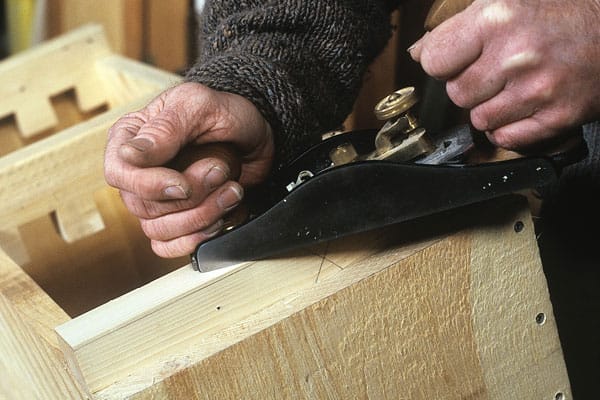
- 11 Fit the gap-covering back piece into place. Adjust the two back pieces so they fit against each other tightly. Then at the top edge of the upper board, mark the angle of the bevel (based on the upper angle of the side pieces) on both ends. Take the board to your workbench. Draw a line on the face of the board joining the lowest extent of the bevel-you can do this with a straight edge, or by using a marking gauge set to the dimension. Set your plane to take coarse cuts-plane with the grain. When you near the line, adjust the plane to take finer shavings and finish it off. Check that the bevel is flat from top to bottom along its whole length by using the side of your plane as a straight edge.
- 12 Slot the back piece into place and use a bevel gauge to capture the angle, then transfer it to both ends of the top edge of the roof ridge piece. Repeat your bevel exercise. You can also bevel the lower edge of the main roof piece. Use the same angle from the bevel gauge, and the same planing method.
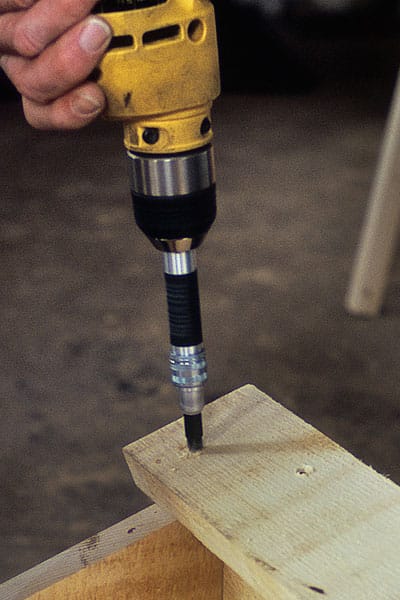
- 13 Begin assembling the box. Drill pilot holes to prevent the wood from splitting. (You may want to countersink the screw heads.) Put two screws into each end of the gap-covering back piece, and two or three into the back and front pieces. We put screws only in the ends of the feet; however, you may use more. For the bottom slats you can either screw them down, or leave them friction fit. The roof ridge piece overhangs the back and sides by 1". The main roof piece overhangs the front by a strong inch. When drilling the ridge piece, keep the angle of the drill vertical to the floor, rather than at right angles to the ridge board itself, otherwise you will come out of the side of the back.
- 14 Place the box on a flat surface and check that it's level. If it rocks, mark the feet all the way around by an equal amount and plane the feet to these lines. (A very simple but effective marking gauge can be made from a 1/4" piece of wood with a pencil taped to it.) If you do not need the feet to be level, perhaps because your box is going to sit nestled among, say, sunflowers, you can skip this part.
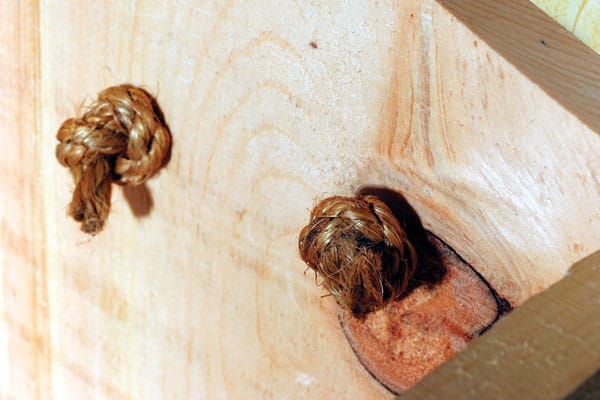
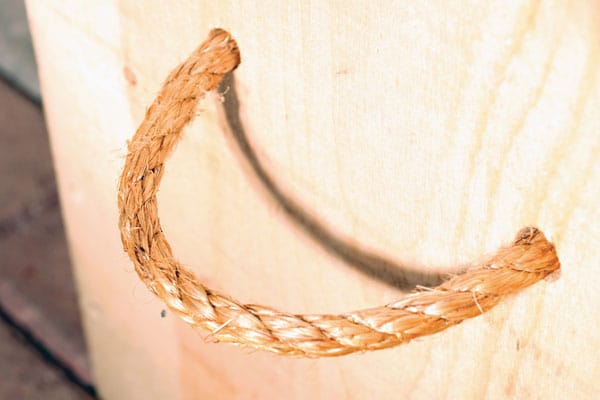
- 15 Measure and mark the location of the holes in the ends for the rope handles-10" up from the bottom and 4" apart. Drill using a brad-pointed bit, if you have one. Drill until the point just comes through, and then finish off the hole from the inside of the box. Alternatively, drill into a piece of scrap. (Both methods eliminate the tear-out on the inside that occurs with straight drilling.) Knot the handles in place on the inside.
- 16 Lay the box on its back on a couple of scraps of 2 by 4. Place the hasp in the centre of the front piece and mark the location of the barrel of the hinged part and the outside edges of the part with the loop. Remove the hinged part. Realign the loop-part, mark and drill pilot holes. Screw in place using the #6 1" screws. On the roof piece locate and mark the hinged part using your pencil marks. Lay the roof piece flat and drill pilot holes. Screw hinged part in place.
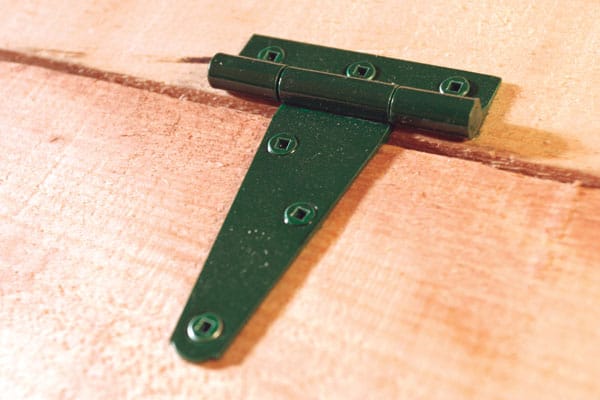
- 17 Now hinge the roof piece to the secured ridge piece. Place your hinges an equal distance in from the edges and mark for the screws. Drill pilot holes and screw them down.
- 18 Embellish to your heart's content. Make it a family project including your children or spouse. Create a hose barn by using 1/4" plywood with 1/4" by 1/2" and 1/4" by 3/8" pine tacked on to define barn-style doors and windows. Or make a hose house with curtains in the windows, paint doors and windows on-or leave your box in its natural glory.
If you want to leave the hose attached to the faucet, you can feed the end of it down between the bottom slats and over to the tap. That's the beauty of the design-it's infinitely flexible.