"Everything that grows has fibres that you can use to make paper," Kathryn Reith Blake explains.
Papermaking is a nature craft from root to stem, from leaf to petal. All around us there are elements that can be used to make this material that are basic to human communication: they grow and flow in abundance. And yet, very few of us have attempted the craft begun 5,500 years ago by the Egyptians, using the stems of the papyrus reed.
Blake, as she is known in the world of paper-art, is K. Reith Blake in the business world where she specializes in archival and historical paper. She lives with her family in Ketch Harbour, Nova Scotia, and has made paper for the movie, The Scarlet Letter, for Fortress Louisbourg, for the Pope, and for museums and archives where the need for acid-free paper is paramount in preservation.
High quality is what draws most people to handmade paper; artists have used it for centuries, loving it for the care in its creation, the materials it is made from, and for its stability. Even beneath the rigours of a wet brush wielded with great passion, it will not warp.
Most paper today is produced by an industrial process which is fast, chemical-based, and heat intensive. The paper produced has all the fibres lined up side-by-side. Tear a piece of newspaper, bond, or craft paper, and you will see. The fibres in handmade paper, by comparison, lay in random formation, hence its stability. The industrial operations use coniferous trees, and this is the fate of much of Atlantic Canada's softwood forest.
The basic principles of any papermaking are the same, though; the tree or plant is treated chemically or mechanically to break it down into its basic cellulose fibres and to remove the waxes and gums. The fibres are beaten with water to make them hydrated and furry so that they will hold together. They are then mixed with more water to form pulp, which is cast as a leaf (sheet) of uniform thickness in a wire mesh mould, pressed hard to expel water, and then air-dried.
Papermaking at home takes time and effort. It involves work with stubborn fibre, chemicals, and lots of water. You'll require some basic woodworking skills and the tools to make two frames, called the mould and deckle (instructions at the end of the article) and space - space where water splashes will do no damage, and an area where you can lay your paper out to dry. In addition, it takes patience. However, the results are undeniably worth it: handmade paper is special, to make and to use. Doing so elicits deep respect for a product we all take for granted, and making it connects you to the thread of the ancients.
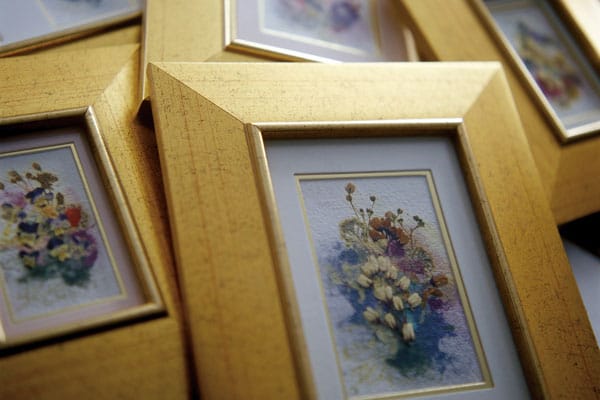
Using flowers from her Nova Scotia garden and environs, plus paper made from wild or garden plants, Blake creates little pieces of Nova Scotia summer to lighten even the darkest days of winter. Below, she shows us how to make our own perpetual bouquet.
Collecting materials:
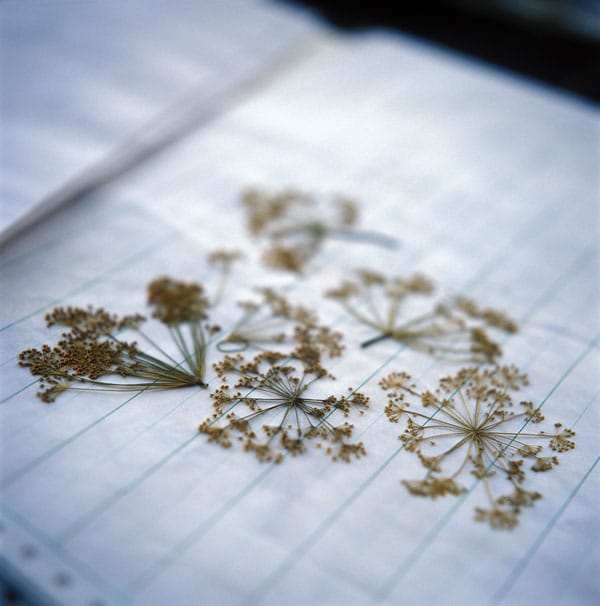
To begin, you must press some flowers, so go for a walk through your garden or nearby field, picking flowers as you go. Design in your mind, balancing colour and delicacy of blooms with greenery. Clover, viola, yellow rocket, and Queen Anne's lace are some of the common flowers Blake uses. She also uses discretion when in the wilds. "Be careful picking Bunch Berry. It grows in boggy areas where you can pull the whole plant and quickly wipe out a part of the ecosystem," she cautions.
Once at home, press your harvest dry using paper and a pile of heavy books.
Blake notes: Flowers are best picked before the heat of the day, but after the dew has evaporated; mid-morning is best. Direct contact with newspaper will draw the colour out of your flowers, so place the blooms between white bond before adding newspaper. It takes two weeks to dry flowers, so note the date on your calendar, or on slips of paper with the flowers in the press. Change the paper pads every couple of days.
Papermaking also begins with a walk, except this time you are gathering fibre instead of flowers. How much you collect depends on several things.
Blake notes: A bushel of lettuce will only make one sheet of paper, so choose ?material that has lots of visible fibre. Gather as much as will comfortably fit in your largest cooking pot and still leave space for the fibre to be covered by, and move freely in, the water.
Making a Mold and Deckle
You will need:
- Square-edged 1" by 3" or 1" by 4" spruce
- Handsaw
- Screwdriver
- 1" or 1 1/4" screws
- Drill and 1/8" drill bit for pilot holes
- 8 metal corner brackets
- Nylon mesh, or screen material
- Staple gun and 1/2" staples
- Blunt-nosed pliers
- Strong thread (optional)
- Square
- Pencil
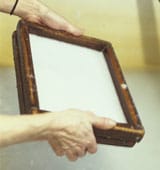
A mould and deckle is simply a pair of wooden frames, usually rectangular, one of which is covered with a fine screen. Together they create a temporary sieve onto which the fibres are gathered by the action of the papermaker's stroke through the fibre vat. Making them is as easy and cheap as you choose, or your woodworking talents allow.
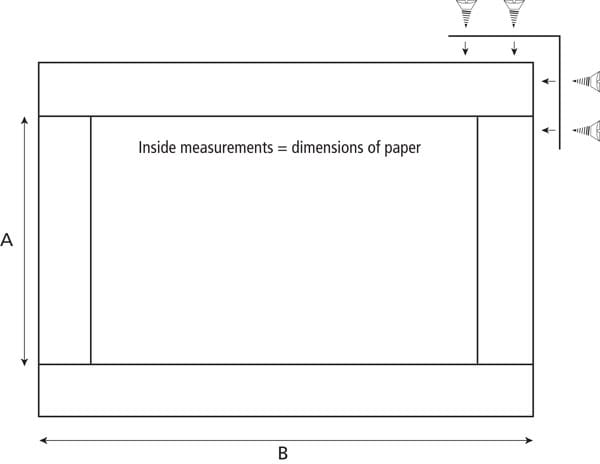
Measuring wood for your frames:
4 x A + 4 x B = Length of spruce required
To make the frames:
Determine the length and width of the paper you wish to make. These measurements will be the inside dimensions of your two frames (see diagram).
spruce to length. Butt the side pieces to the top and bottom and dry fit the corner brackets. Pencil in the placement of the screws and remove the brackets. Drill your pilot holes. Put everything back in place and screw together, making sure to keep the corners square. Paint the frames with waterproof paint or varnish.
To make the mould:
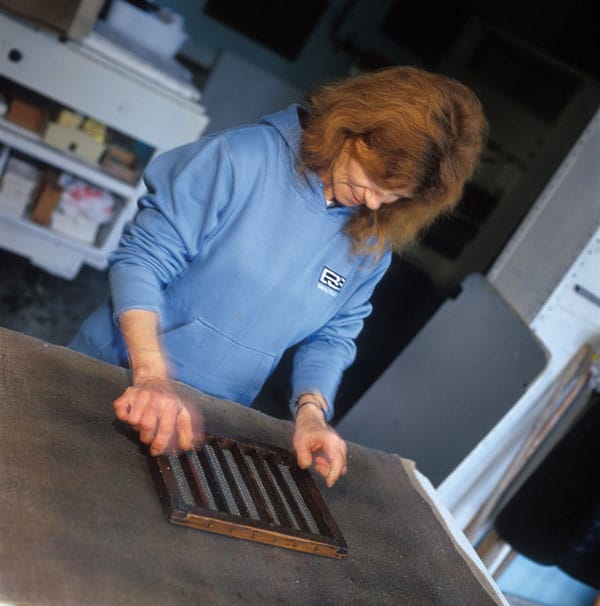
Dampen your mesh or window screen, and stretch it across the mould, stapling alternate sides to keep the tension even. Use a pair of blunt-nosed pliers to help pull it tight. If you find it difficult to get an even, flat screen, try stringing strands of tough thread across the frame first to support the centre of the mesh.
To make the deckle:
In order to make a snug fit between the deckle and the mould, strips of felt can be glued to the lower faces of the deckle frame. Remember to use waterproof glue.
Blake stitches a watermark, or signature, in the corner of some of her moulds. You can too.
Materials needed for paper dainties:
- Large cooking pot
- Lots of water
- Some alkaline substance: soda, lye, potash, or wood ash
- Wooden spoon
- Rubber gloves
- Safety glasses, if you are using lye
- Dishpan, or other large, flat container, 6-8" deep minimum
- Mould and deckle that fits easily within this container (instructions above)
- Swimming pool test kit (this is to check the alkalinity/acidity of your fibre vat and therefore your finished product. Certain chemicals may need to be on hand also to make the adjustment to neutral: vinegar or ascorbic acid, and bicarbonate of soda)
- Meat tenderizer or mallet
- Couching cloths or felts (woven woollen blankets are ideal. Cut them slightly larger than the sheets of paper you will be making. Synthetic fibres do not work as well)
- A sponge
- 2 pieces of plywood, or other stiff board, slightly larger than above
- 4 C-Clamps
- A heavy bucket of rocks
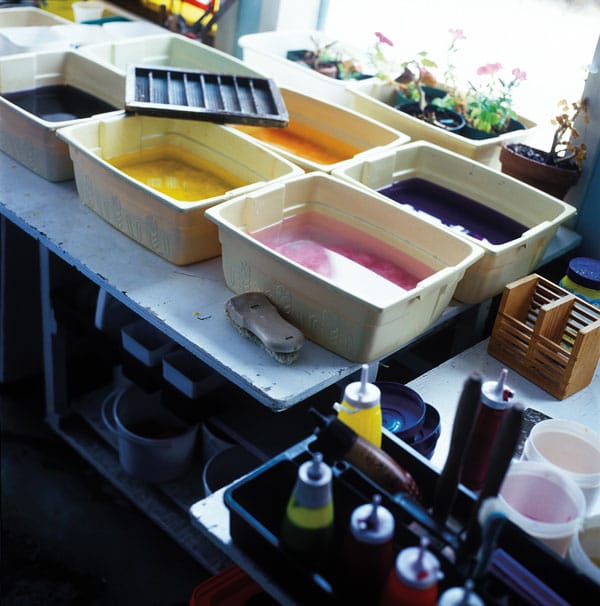
- Hot water fabric dye in various colours
- 3 or 4 plastic condiment bottles (ketchup, mustard etc) with their lids. Fill each with a soup made of stuff, water and fabric dye. Leave one un-dyed.
- Old window or door screen, or screens stretched over a cookie sheet. If you are making more than one sheet of paper, have enough drying screens on hand
Now to work:
Step one:
Simmer your material in lots of alkaline water until it is very, very soft. Use one part soda, lye, potash or wood ash to five parts fibre. Take care with these chemicals; wear rubber gloves, follow safety guidelines on any packaging, and don't splash them on your kitchen table.
Step Two:
Rinse your material until it feels clean and the water runs clear. pH test it if you wish; Blake recommends a swimming pool test kit for this. These are available at your local hardware store. You can also use Litmus paper if you can find a source. Adjust until the material is Neutral, or 7. Vinegar and ascorbic acid are both readily available household acids, and bicarbonate of soda is a household alkaline, but note: vinegar might "scent" your paper.
Step Three:
Start beating with a meat tenderizer or mallet, sprinkling the material with water as you work to make the fibres separate from one another, swollen and furry (fibrillated). After beating, test the fibres by putting a small portion in a glass jar full of water. Shake it up. If there are any plant-material floaters, return it to the rest and keep beating. If all you see is an opaque soupy mixture then you are finished beating.
Blake notes: Hand-beaten paper is ?supple because the fibres are long, and the more you beat the fibres the finer the paper will be. A commercially bought "Hollander" beater makes shorter fibres so the finished product is not as fine. You can use a blender to break down your fibres but they will be shorter still, and your finished paper will be craft quality.
Step Four:
This is the stage where you add material if you wish to make textured paper. Add the material by density, two per cent of this fibre, 10 per cent of that…you can add small seed husks, fragments of grass clippings, and petals. Envision and experiment.
Step Five:
Collect the beaten pulp, and feed it into your vat of water at the rate of 10 per cent pulp, 90 per cent water. This mixture will now be referred to as "stuff." A vat can be something as simple as a dishpan, or an easily available plastic storage container. Stir it up.
Step Six:
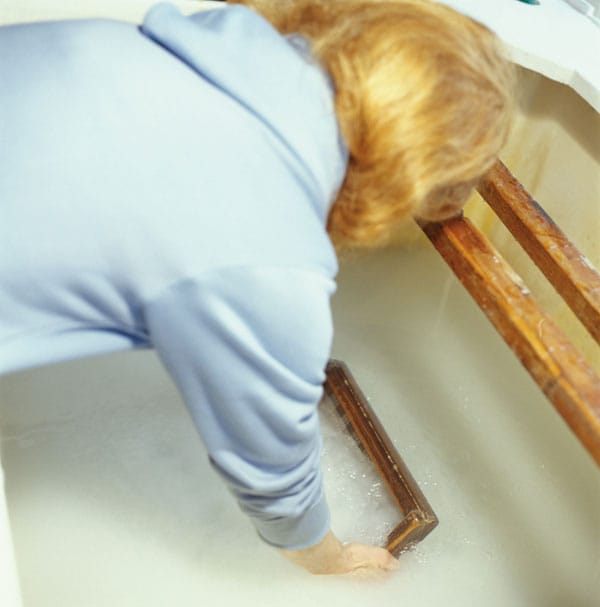
Take the mould, mesh side up, and lay the deckle on top of it. This is the unit that the sheet of paper is made upon. Hold them together firmly and vertically over the vat. Dip the lower edge into the stuff at the far side of the vat. Using an arcing motion let the mould and deckle down until the pulp completely covers them and they are in a horizontal position. This is called "casting the wave." Let the mould and deckle rest for a moment under the surface and then pull them straight upwards, swiftly and steadily. It is important to break through the surface tension of the vat without losing water off your mould screen. This water will allow you to level your sheet of fibres.
Step Seven:
Shake the excess water from the mould and deckle. Shake it forwards, backwards, and side to side, without tipping. Stop as soon as the fibre mixture is no longer a suspension and has become stiff. Your sheet of paper fibres should be 1/8" thick.
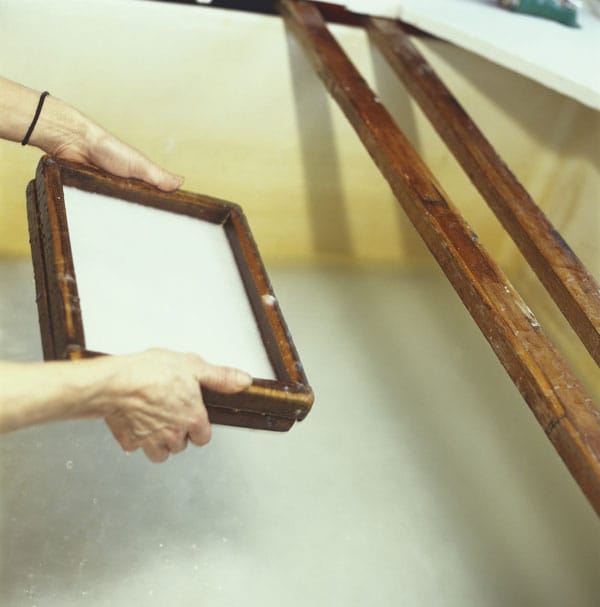
Step Eight:
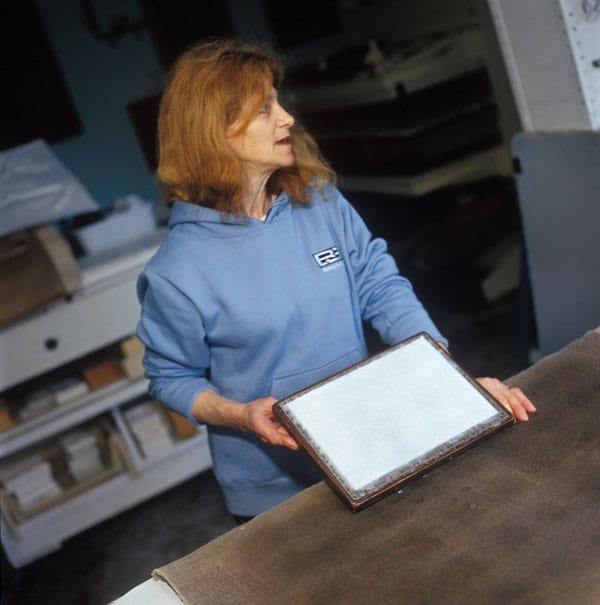
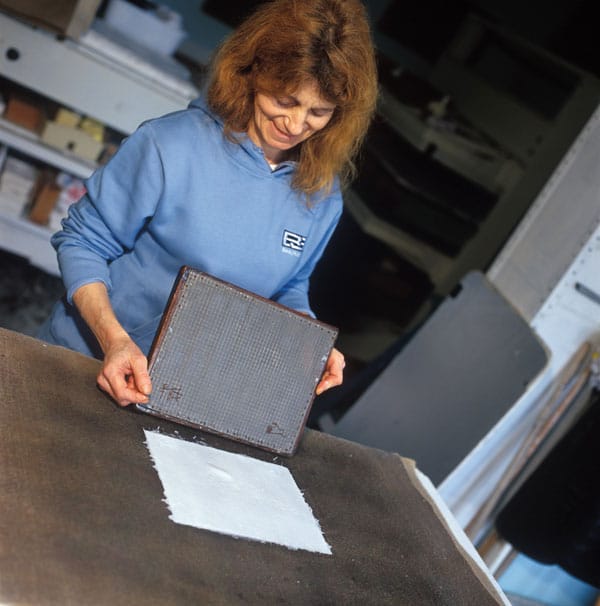
Lay the mould and deckle down on a level surface, and remove the deckle.
Step Nine:
Place one of the pieces of plywood on the draining board beside your kitchen sink. Alternatively place some wooden slats over your sink and put the plywood on top of these. Lay the couching cloth (woollen felt pads) on top of the plywood. Place lower edge of mould on the near edge of the couching cloth and tip the mould onto its face pressing the paper down onto the cloth. Run your fingers over the screen to release the sheet of paper onto the couching cloth. Lift the mould being careful not to tear the sheet of paper. Dab the surface with a sponge to remove excess water.
Step Ten:
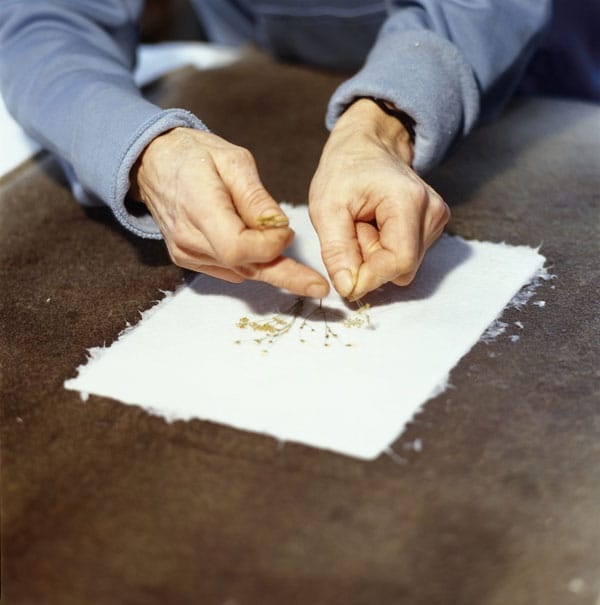
Make your flower arrangement.
Step Eleven:
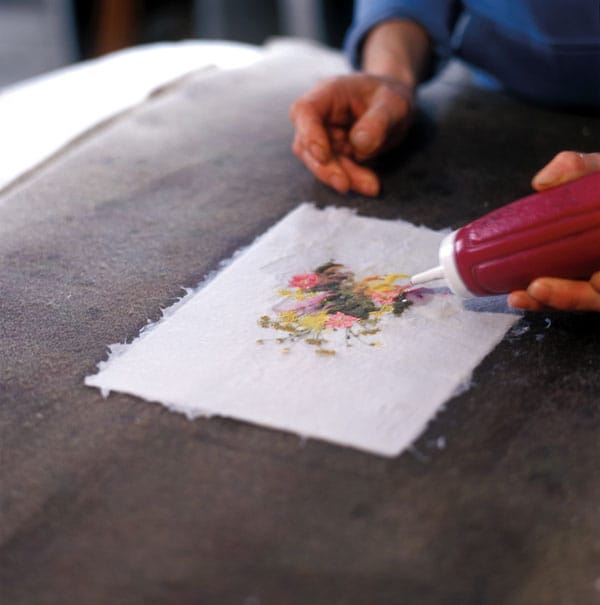
Engage the stems and edges of the petals. This is achieved by laying some of the soupy mixture from the pulp vat on top of the flower arrangement; the furry fibres above and below the flattened stalks and flowers will engage with each other and affix the arrangement in place. You may choose to use the condiment bottles listed in the "materials needed" list, with stuff dyed different colours, using hot water fabric dye, for this job.
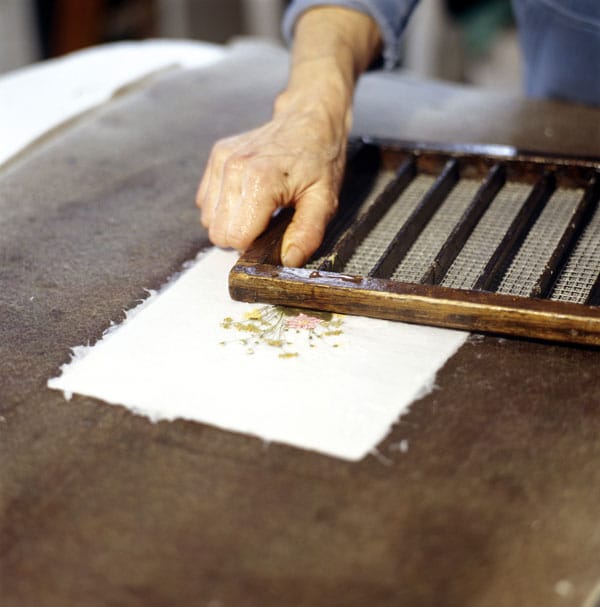
Step Twelve:
Cover your creation with another couching cloth. If you are only making one picture continue onto step 13. If you are making more, repeat steps six through 11, adding more pulp to the vat when you see that the layer of fibre on the mould is too thin. Pile your sheets of paper, separated by couching cloths, one on top of another.
Step Thirteen:
Cover with a second piece of plywood, and clamp top and bottom panels together with the C-clamps.
Blake notes: Pressing is important. You can use anything to do it as long as it makes the water drip. I have used a ten-ton Bottle Jack, and even my pickup truck; I drove it up a cross ramp onto the column of couched paper, but a bucket of heavy rocks will suffice. Paper is very three-dimensional; the back, the front and middle dimension all need to be evenly dried to prevent cockling.
Step Fourteen:
Change the couching cloths and re-clamp as often as necessary.
Step Fifteen:
When the dripping stops, put your sheets of paper on the window screen so that the air can circulate. You can also run a fan to speed up the final drying process.
Step Sixteen:
Buy or make a picture frame. Complete your picture and hang it on your wall out ?of direct sunlight to prevent fading and enjoy it fully on some January day when a snowstorm is raging and summer is far from your mind.