
This Rory the Dory Man wind vane is as decorative as it is useful.
The wind can talk, dance, and sing; it can be harnessed, read and put to work. But it can also play. Although the whimsical forms of wind vanes and whirligigs illustrate man's desire to have fun with the wind, they were actually tools. Reading wind direction from a vane, or speed from a whirligig, helped those versed in the weather lore of a particular area to forecast weather. Fishermen and farmers, and others who worked close to nature, relied on this information. Today we have meteorologists who use high-tech gadgets to forecast the weather, but the basic tools have not changed too much. The modern wind-speed indicator is just an updated whirligig, and nothing tops a wind vane for showing the direction of the wind.
This design for Rory the Dory Man is not high-tech in the slightest. It is pure fun, with a whiff of usefulness thrown in. Copy if you like, or design your own. It can be as plain or as fanciful as you wish. The important thing is to present a broad, flat surface to the wind so it can pivot until the air pressure on each side is equal. Shaping it so that it is narrow at one end and wide at the other will help indicate wind direction: the narrow end will point into the wind. Add a whirling umbrella, or something else, if you like; it is merely decorative.
John chose to use a 1" board for the body of the weather vane so the material would be sufficiently strong once he drilled the 5?16" hole for the pivot point and hole for the umbrella shaft. You could use thicker or thinner material, as you wish. John used 1/4" plywood for the umbrella sections, but again, the thickness is up to you. These are the dimensions that worked for him, but feel free to experiment. You could design a pivoting platform with your weather vane and whirligig on top, or cut a design out of metal and coat it with rust inhibiting paint to prevent corrosion.

Step 1
Step 2
Step 3
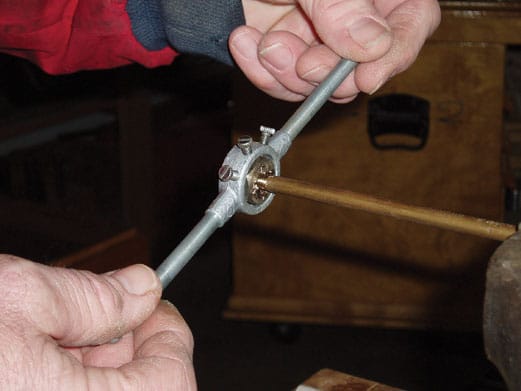
Step 4
Step 4b
Step 5
Step 6
Step 7
Step 10
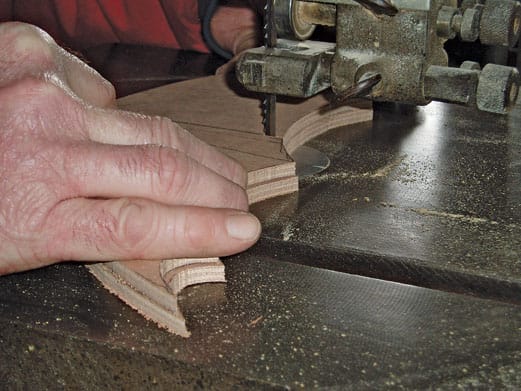
2. To make the four umbrella sections, cut the 15"-long, 9"-wide, 1/4"-thick exterior-grade plywood into four equal 7 1/2" x 4 1/2" pieces. Stack these four pieces with the scaled-up pattern on top and use a bandsaw or jigsaw to cut all four sections of Rory's umbrella at the same time.
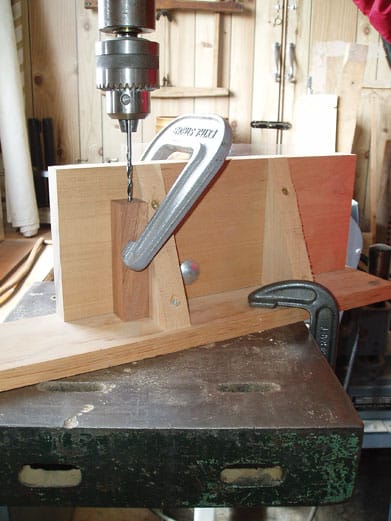
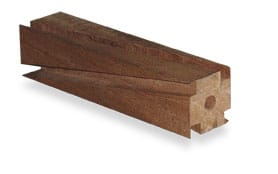
3. Drill a 1/4" hole down the centre of the umbrella's 4" hardwood hub. Use a drill press and a right-angle jig, or a hand drill. John used a drill press to drill halfway through from each end rather than all the way through from end to end, to reduce the risk of going off-centre. He reamed out the hole with the 1/4" rod to make the hub spin more smoothly.
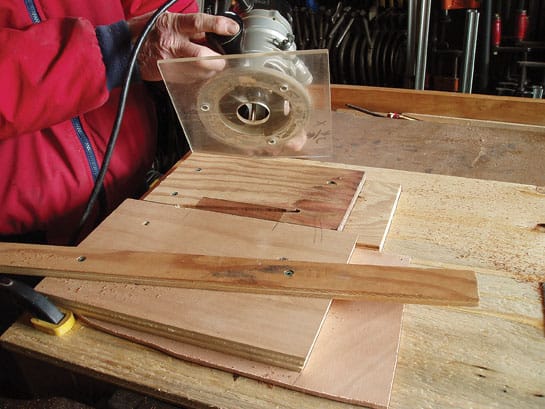
4. Make slots in the hub for the four umbrella sections. John tried both straight and angled dadoes; both rotated in the wind equally well. If you want to make angled dadoes, here is a guide for building the router jig that John used. Cut a 4"-long slot to hold the hub in the edge of a 1"-thick board. Butt the board up to another one of the same thickness and screw them both down to a scrap of plywood. Strike a couple of locator pencil lines across the seam where the boards meet. Screw a straight edge onto the board without the slot in it. Use the router with a 1/4" bit chucked into it as a guide for placement. It must lie at an angle and distance from the slot so the router bit will cut a 3/16"-deep slot from the lower right hand to the upper left hand corner of the hub. Make a locator mark on the router base plate so that the same point, or side of it, touches the straight edge for each of the four cuts. Make starting and ending channels in the jig. Before committing to your jig, cut a test slot in a 4" x 1" x 1" scrap piece. Make any necessary adjustments and then cut one slot in each face of the hub.
5. Insert the umbrella sections into the slots of the hubs using 5-minute epoxy.
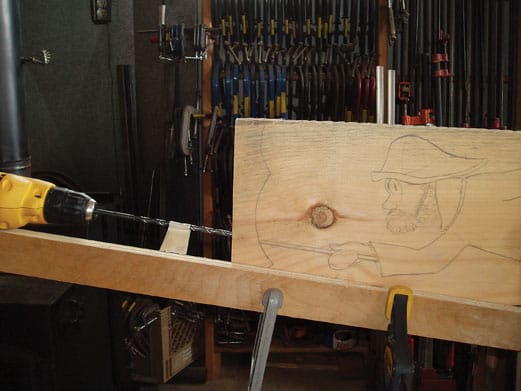
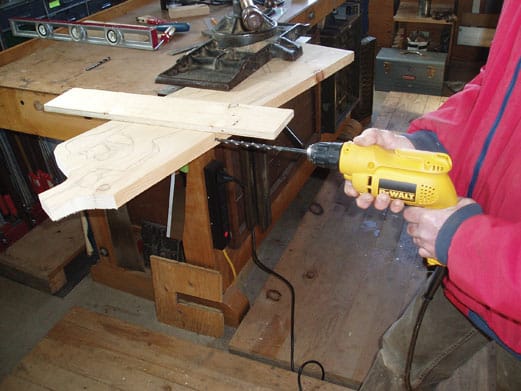
6. Drill a 1/4" hole for the umbrella rod into Rory's mitten and arm. Use a straight edge as a guide. Be careful not to drill through the back of the elbow. Ream it out with a 1/4" brass rod.
7. Eyeball where Rory's pivot point will be once he is complete, with the umbrella inserted. John chose a point in line with Rory's shoulder. Then decide on the horizontal angle you wish Rory to rest at, and drill the 5/16" pivot hole 3" deep into his body. To reduce friction, line the hole with a 4" length of a ballpoint pen case that has an inside dimension of 1/4".
8. Cut Rory out on the bandsaw or with a jigsaw. Smooth out all the rough edges.
9. Finishing touches: insert the brass rod. Clamp it into the bench vice and paint Rory in bright colours. Outline his limbs and the seams of his sou'wester with a contrasting colour to make them stand out. An interesting piece of Nova Scotia folklore collected by Helen Creighton: fishermen's mittens were always white; any other colour was considered unlucky. Paint the umbrella sections, remembering the principles of the colour wheel for compatibility.
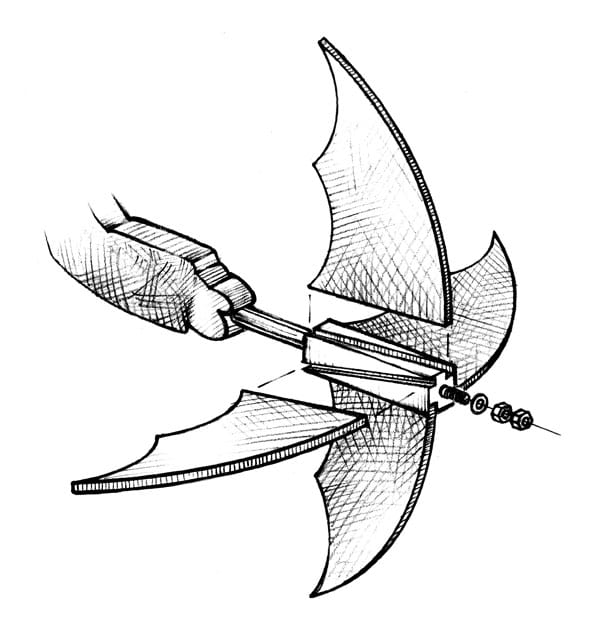
10. To ensure that the umbrella spins freely, insert the brass rod into the umbrella hole and slip a 2"-long piece of ballpoint pen case and a couple of stainless steel washers onto it. Put the umbrella on next, and mark the rod 1?2" beyond its end. Cut the rod at this mark. Put a 1/4"-long thread on the end with a tap and die. Once the umbrella is in place, it can be held with a washer and a couple of nuts tightened against each other.
11. Take Rory outside, stick him in the ground and wait for the wind. If he doesn't quite point into the wind, you might add a Plexiglas cloud to his leg area to give him more surface area.
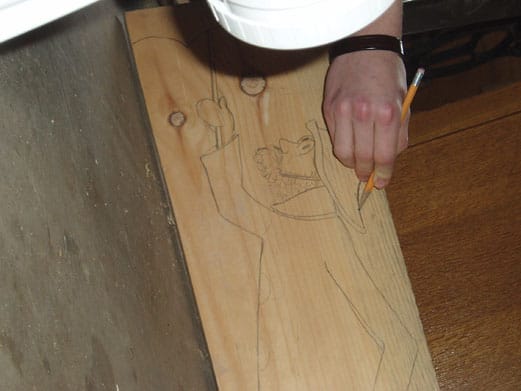
Transferring the image
There are several ways to transfer the design from paper to wood:
(a) Use a photocopier to enlarge the sketches. Then either cut the sketches out, or use a soft pencil to rub over the back of the sketches, then lay them on their respective pieces of wood and either draw around them, or over the lines. A hot iron on the paper will also transfer the toner to the wood. Any design transferred using this technique will be the mirror image of the original design, so take that into consideration.
(b) Draw a grid of 1/4" squares on two pieces of tracing paper. Then draw 1" square grids on the 1" thick pine board and one piece of the 1/4" thick plywood. Transfer the sketches square by square. (Note: this description is for 1/4"-1" scale)
(c) Use a projector enlarger to transfer the sketches to size directly onto the lumber.
Materials
- Pivot: 24"L x 1/4" diameter brass or stainless steel rod
- Umbrella rod: 12"L x 1/4" diameter brass or stainless steel rod
- Rory's body: 24"L x 12"W x 1"T pine board
- Umbrella blades: 15"L x 9"W x 1/4" exterior-grade plywood
- Umbrella Hub: 4"L x 1"T x 1"W hardwood block
- 2 ballpoint pen cases
- 5-minute epoxy
- Acrylic or oil paint
- Nuts and washers, 1/4" centres
- Scrap lumber of various thickness and dimensions for jigs
- Screws
- Finish nails
Tools
- Drill
- Drill press (optional)
- 1/4" drill bits, brad point, regular and 12" length
- 5/16" drill bit
- Bandsaw or jigsaw
- Router with 1/4" bit
- Screwdriver
- Hacksaw
- 1/4" tap and die set
- Clamps
- Bench vice
- Workbench
- Pencil
- Projector/enlarger/photocopier, or tracing paper for enlarging picture
- Wood rasp or spokeshave
- Sandpaper
- Paint brushes