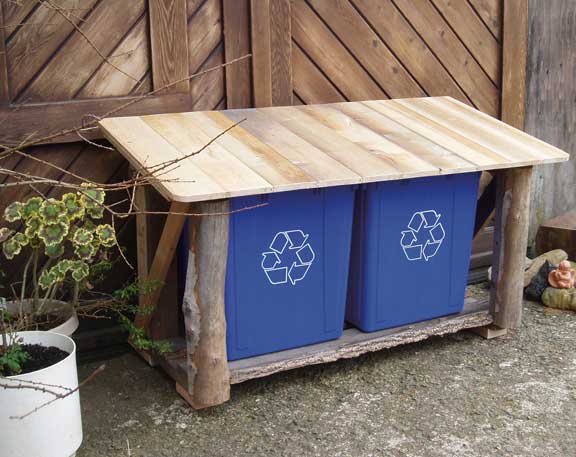
If space is at a premium and your blue bags a burden, it's time to take control of your recycling with this outdoor blue bin hut. We modelled our structure on an existing firewood rack, adding decorative rustic slabs to the face of the end frames.
This handy hut keeps recyclables out of sight - and mind.
If space is at a premium and your blue bags a burden, it's time to take control of your recycling with this outdoor blue bin hut. We modelled our structure on an existing firewood rack, adding decorative rustic slabs to the face of the end frames. The front was left open to facilitate dumping the bins, but if you want to add a facade, it's just a matter of adding cross-pieces inside the front legs and fastening your chosen material to the front.
Locate your blue bin hut near your kitchen door, on your deck or in your garage-somewhere handy. It can even do double duty when you need extra tabletop space for drinks, plates and napkins during a family barbecue: prop the lid up level with a 4' length of 2 x 4.
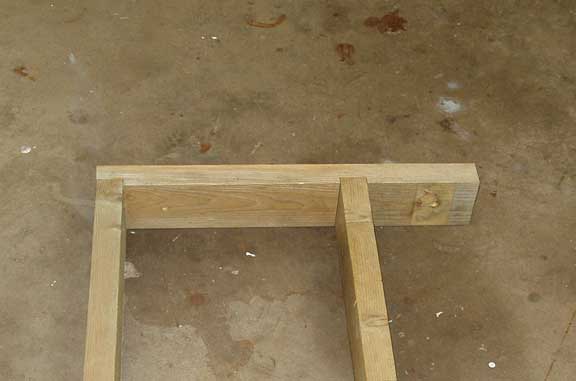 1. Cut the lengths of 2 x 4 for the two end frames and lay out your joints. Notch the top and bottom crosspieces (the stringers) to receive the uprights. Make sure the uprights are flush with the ends of the stringers, joined in open-faced notches (rabbets). The rear uprights will fit into notches set in from the ends (dados). All the notches are 1½" wide (the same as the upright), run right across the stringers, and are ½" deep.
For the fronts of the stringers, lay out your cutting lines 1½" from the end, and down the sides ½". Pencil in the depth with a line along the bottom edge of your joint.
2. 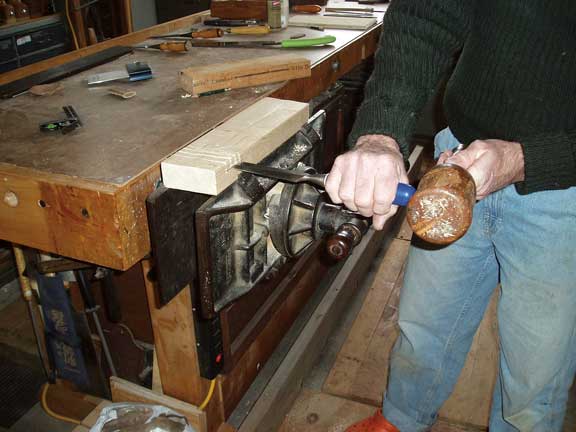 Clamp the wood into a bench vise and saw through the line on top, cutting straight down the side lines, checking on both sides for depth. Make another ½"-deep cut parallel to this one in the middle of the rabbet. Remove the waste using a chisel and mallet. Check that the uprights fit flush and square to the stringers. Lay out the rear dados 2" from the end of the stringers: pencil the first line 2" from the end, and the next line 3½ " from the end (for a joint 1½" wide). Mark the depth as before and saw and chisel the wood away.
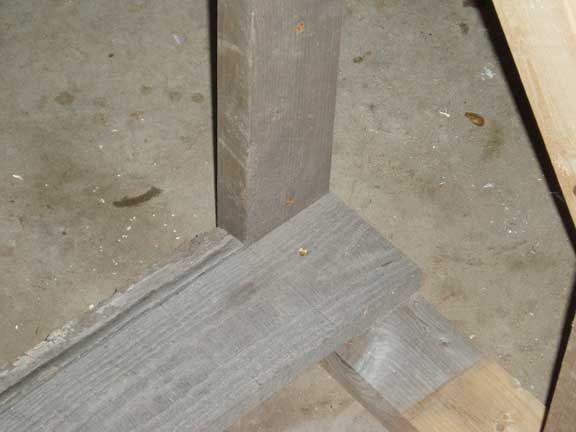
 3. Build the two end frames. For each, fit an upright into the two dados; then fit the second upright into the two rabbets. Square it up and drill two pilot holes per notch through the stringer and into the end grain of the upright. Use two long screws for each joint.
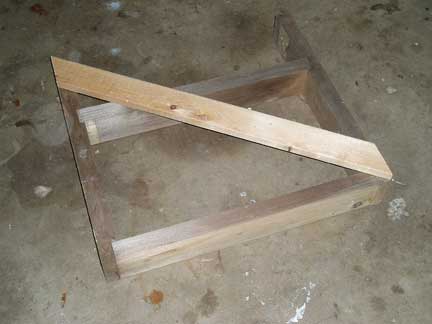
Lay a 1 x 2 diagonally across the outside of each end frame from the front corner of the top stringer to the rear corner of the bottom stringer. Mark the angle of the cuts on the underside of the diagonal. Also mark the top end with an arrow. Remove 1 x 2, saw the ends off, then reposition in place. Drill pilot holes and screw the diagonal onto the end frame. Use 1¾" screws.
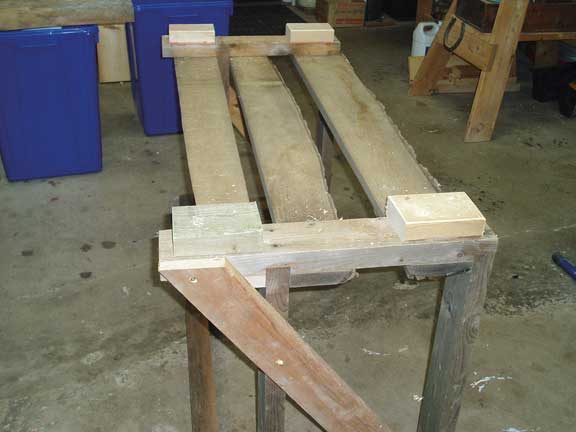
 4. Stand the two end frames up and lay the floorboards (cut to length) across, with their ends flush to the outside edges of the stringers. Fasten the rearmost one with one 1¾" screw at each end through the centre of the board, drilling a pilot hole first. Leave the middle board, or boards, loose for now.
5. Rabbet the front floorboard to fit around the front uprights: butt the front board up against the uprights (making sure the ends are flush) and lay a ruler against the inside edge of each upright to transfer lines onto the board, 3½" from each end. Remove the floorboard and at each end pencil a line at right angles to the first, 1½" from the front edge of the floorboard. Square the lines down the front and side faces of the board. Clamp the board in the vise and saw the rabbets out. Slot the floorboard snugly in place; drill and screw it down. Space the remaining boards evenly and fasten in place. (The spaces allow water to escape.)
 6. Clamp a piece of 1 x 2 flat under the back overhang of the top stringers, snug against the uprights. Measure and compare the distance between the end frames at the top and the bottom, and adjust. Drill pilot holes through the 1 x 2 into the underside of the stringers and screw in place, using the 1" screws. Trim to length if necessary.
Tip the frame onto its front and lay the stock for the rear diagonal from the top corner of one of the uprights to the bottom corner of the other. Mark and cut as you did for the side diagonals and fasten in place. Then fasten feet onto the bottom stringers, set back from each corner an equal amount. Stand the frame back up.
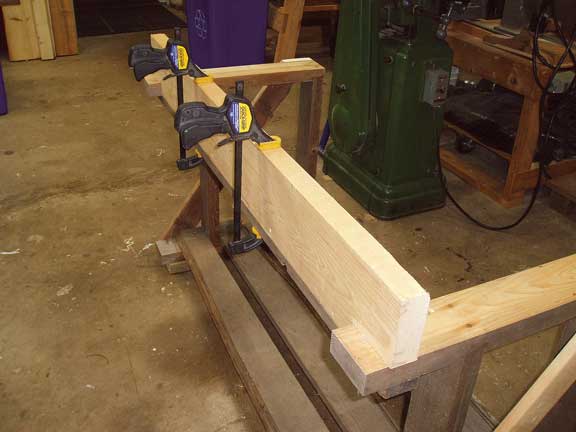 7. Clamp the 2 x 6 onto the top stringers, flush at the ends and rear. Using a ruler, as you did on the floorboard, mark for rabbets around the stringers, 1½" by 3½", so that the 2 x 6 will sit down on top of the rear 1 x 2. Cut the rabbets out and clamp the board back in place. Drill pilot holes from underneath and screw through the stringers with the long screws, and through the 1 x 2 with the 1" screws.
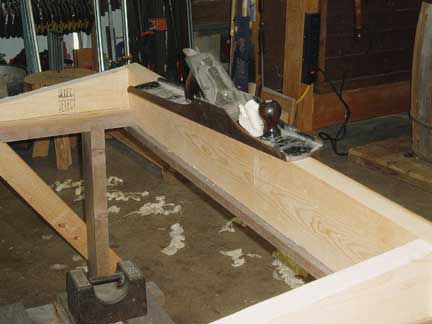 8. Butt the 2 x 6 stock for one of the wedges against the rear 2 x 6 and flush with the outside edge of the stringer; clamp it in place with the clamp on the inside of the frame. Hold a straight edge on the outer face of the 2 x 6 and draw a line from the upper rear corner of the back piece of 2 x 6 to the front of the wedge-leaving the wedge ¾" thick at its lower end. Remove clamps and saw out the wedge. Smooth with a plane and use the wedge as a pattern for a second wedge.
 9. Where the angled lines on the ends of your rear 2 x 6 meet the front, connect them across the front using a pencil and straight edge. Plane that shallow angle onto the rear 2 x 6.
Clamp the wedges back in place, and screw through from the top, 2" from the narrow end. Put two more screws into each wedge from the underside of the stringer.
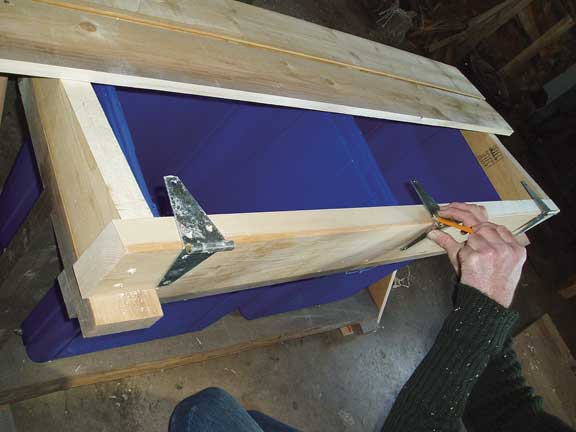 10. To locate the hinges, measure and mark the centre of the rear 2 x 6, and measure and mark 5" from each end. Hang the three strap hinges on their marks and trace them on the top of the 2 x 6. Mark the thickness of the hinge on both sides of the 2 x 6. Make three shallow saw cuts to this depth at each location, and using the same method as with the rabbets and dados, chisel out the waste wood from the mortise. Check the depth as you go until the hinges lie flush with the surface. Then put the hinges in place and screw them to the back of the 2 x 6 only with ¾" screws.
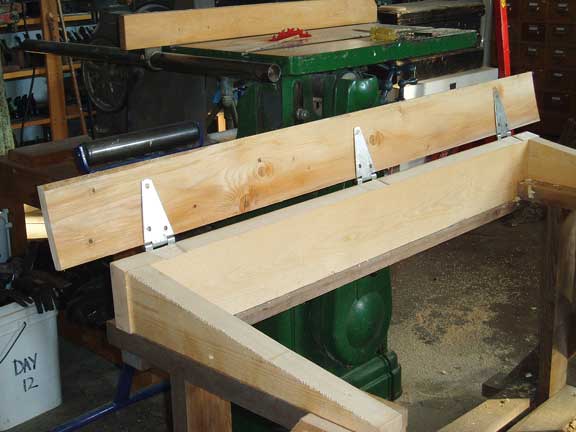 11.Lay the rearmost longitudinal piece of the lid across so that it covers the strap hinges. Centre it and make it flush with the rear 2 x 6, and clamp in place. Reach inside and screw the tails of the three hinges in place. Remove the clamps and flip the board upright; add the rest of the hinge screws.
12. Lay the lower longitudinal piece in place with its groove facing down slope; the groove will act as a drip stop when outside in the rain. Centre it and let it overhang the front of the wedges by an inch.
Arrange the top boards with their crowns up so that water will be shed; slot the tongues into the grooves, and centre the whole panel. Starting from the middle and working outwards, clamp and fasten the panel, one board at a time, to the upper longitudinal piece-screwing up from the underside. Once all the boards are fastened, ensure that the lower longitudinal has not moved and again, starting from the middle, clamp and screw the boards in place.
13. To trim the top, hold a straight edge along the front edge, equidistant at both ends from the wedges underneath, and strike a line. Repeat at the back edge, using the lower line as a guide. Saw along both lines.
Trace a curve on the lower two corners using a compass or small tin can; use a jigsaw to saw around these curves-or just handsaw off the corners and sand smooth. Round edges to make them hand-friendly.
Slide a piece of 1 x 2 under the rear of the lid, snug it up against the barrels of the hinges and mark to length. Saw to length, clamp in place, and, starting from the middle, drill and screw it on. This is a backstop for the lid so that it does not have to rest against a wall when open.
14. Finally, the space between the two longitudinal pieces of the top can be filled to stop driving rain from getting into the blue bins-and causing problems like freezing bags in place. Using some leftover T&G, measure, mark and saw two pieces to length. Clamp the two pieces into the bench vise and plane off the tongues; flip them over and chisel off the grooves. Clamp them in place and attach with 1¼" screws.
Cutting List:
- 2 x 4; 8 @ 20"; frame uprights and stringers
- 2 x 4; 4 @ 5"; feet
- 2 x 6; 1 @ 46½"; upper rear piece
- 2 x 6; 2 @ 18½"; side wedges
- 1 x 2; 2 @ 30"; side diagonals
- 1 x 2; 1 @ 50"; rear diagonal
- 1 x 2; 1 @ 50", or alternative; back stop
- 1 x 5 T&G; 2 @ 53"; top longitudinals
- 1 x 5 T&G; 10 @ 26"; top boards
- 1 x 5 T&G; 2 @ 11¼"; top infill
- 1 x 5; 3 @ 47"; or 1 x 4; 4 @ 47"; floorboards
Materials:
- #8 deck screws, 2½", 1", 1¼"
- 18 x ¾" screws
- 3 strap hinges, 2" or 3"
- 2 x 84 L blue bins
Tools:
- Measuring Tape
- Handsaw
- Jigsaw
- Chisel and mallet
- Combination square
- Screwdriver
- Drill
- 1/8"drill bit
- Pencil
- Sandpaper
- Bench vise
- Clamps
- Hand plane
Debugging: fruit fly control
A female fruit fly lays about 500 eggs in her lifetime of eight to 15 days, so battling a squadron that has invaded your kitchen can be an ongoing task during summer months. Moist organic matter and fermenting liquid are the favoured nurseries for pregnant fruit flies; removing these from your kitchen means you will be well on your way to success. Cut the bruise off the apple; refrigerate your bananas (sure, the skins will turn brown, but the flesh will remain creamy yellow); scrub out your garbage cans and compost bins before lining them with plastic bags and closing them with tightly fitting lids. Rinse tin cans and beer and pop bottles before placing them in your recycling bin. Drains are also a common breeding ground; scrub weekly with washing soda, which inhibits mold growth. It's available in the laundry aisle of grocery stores.
To rid the air of adults (one less adult means fewer eggs), a spray bottle full of rubbing alcohol is effective. Old-fashioned sticky fly paper still works, too.